
Taylor Shoulder Bag Pattern Tutorial
Join our Taylor Shoulder Bag Sew-Along and create your very own stylish and functional bag! In this step-by-step tutorial, we’ll walk you through the entire process of sewing the Taylor Shoulder Bag, making it easy for both beginners and experienced sewists to follow along. Whether you're looking for bag patterns, a crossbody bag pattern, or a hobo shoulder bag design, this sew-along is perfect for you.
Get started by purchasing the pattern here, so you can follow along as we guide you through every detail of crafting this chic and versatile bag. If you love working with bag sewing patterns, exploring purse patterns to sew, or learning how to make a crossbody bag, this project is a must-try! Ideal for those who enjoy DIY crossbody bags, this tutorial will help you master the art of bag making. Whether you’re into handbag patterns, a classic hobo bag pattern, or simply looking for a fun and rewarding sewing project, this sew-along has everything you need.
Before we begin, let's talk fabric
Preparation:
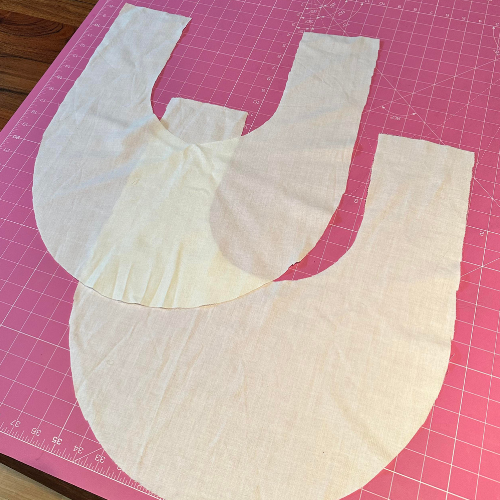
Cut the bag pattern piece on the fold. Cut it out 2 times. Also make sure to snip small cuts in the fabric/soft leather at each notch of the pattern. The first few steps are if you would like decorative top stitching, this is optional. Skip these steps if not desired.
If you are using pleather or leather for this bag, please note:
- Preferably use a heavy duty thread
- It’s important to use a leather sewing machine needle (the size needs to be suited for a heavy duty thread)
- It is possible to iron on soft leather if you place a cloth in between the leather and the iron. Iron carefully on medium heat (two dots) with very little steam.
- It is recommended to use a walking foot when working with leather
Decorative Stitching (Optional)
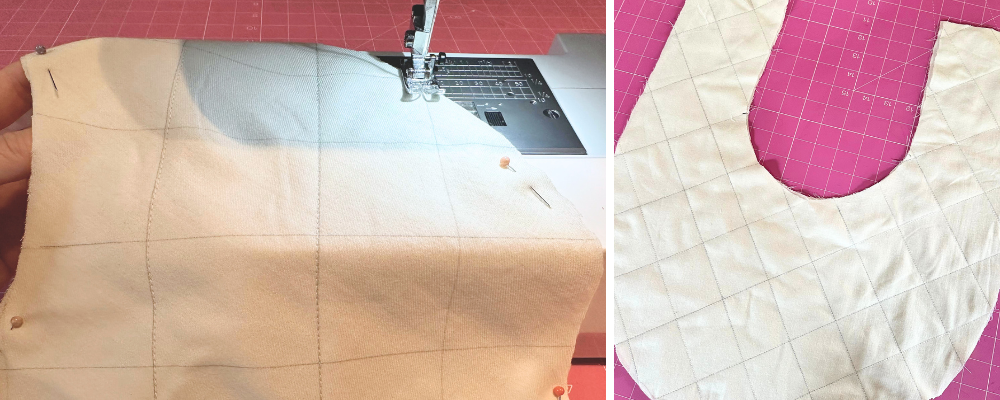
1. Draw straight lines on the diagonal as far apart as desired. Below, I chose to draw lines 6cm apart. I would also recommend using a fabric marker (if using woven fabric) or a led pencil for leather. Make sure to mark the leather on the wrong side, so it doesn’t show on your finished bag.

2. Sew straight lines over the marked lines with a stitch length of 3 or above.
Constructing the bag:
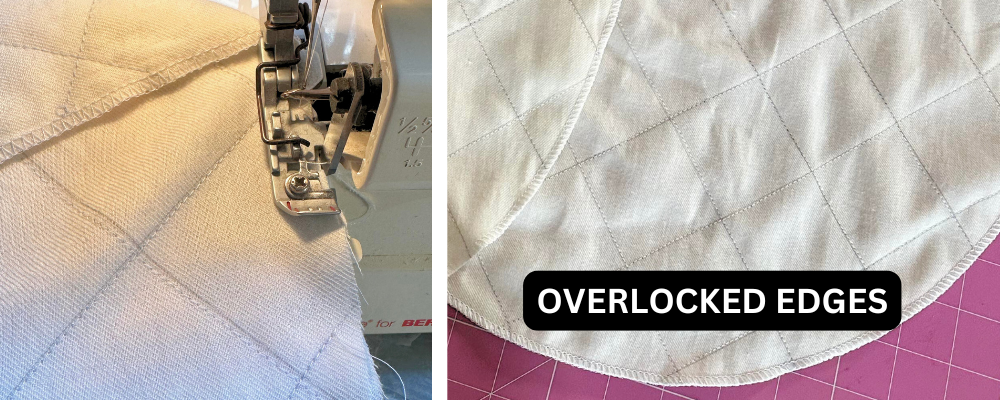
3. Start by overlocking all the way around the edges of the pattern pieces, so that they don’t fray. If you are using leather or pleather you don’t need to worry about this step.
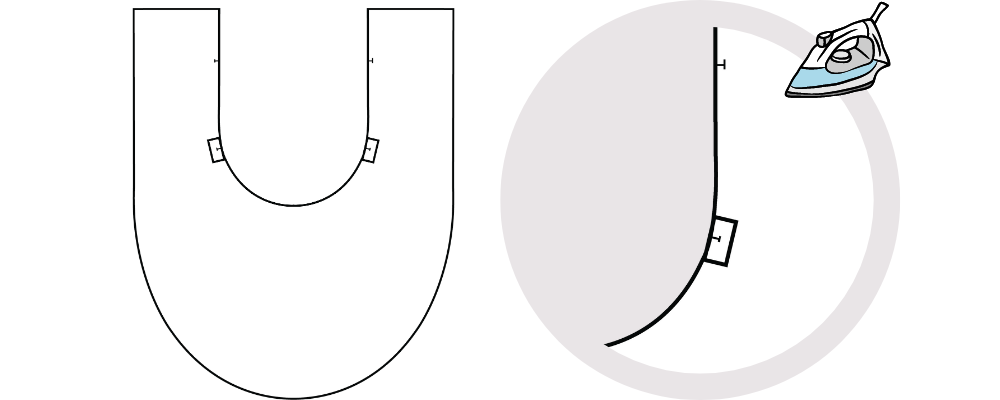
4. Cut small rectangles of interfacing and iron them over the lower notches. Make sure to iron them on to the wrong side of the fabric, so they don’t show on your final product. This step isn’t needed for leather.
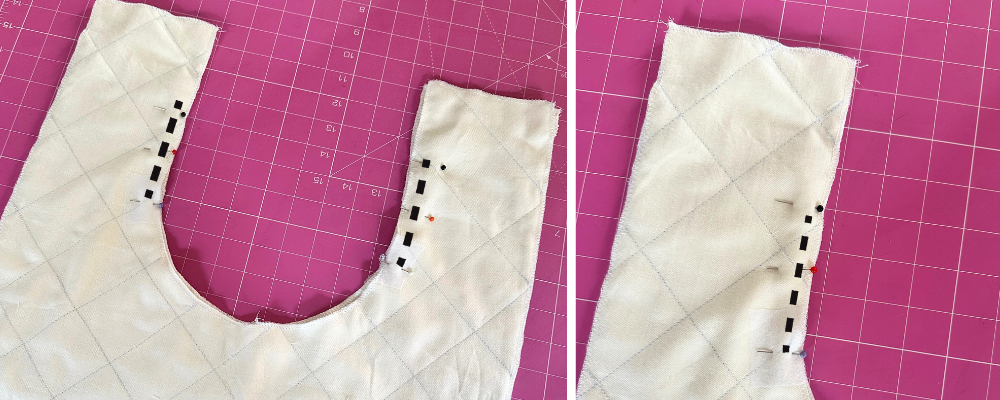
5. Pin the pattern pieces together, (right sides facing) and stitch up 12cm from the lower notch with a 1cm seam allowance.
6. Fold back the 1cm seam allowance along the seam line where we will be attaching the zip shortly. Make sure to place a piece of cloth between the iron if you are using soft leather. To make it easier to iron, use a tailors ham.
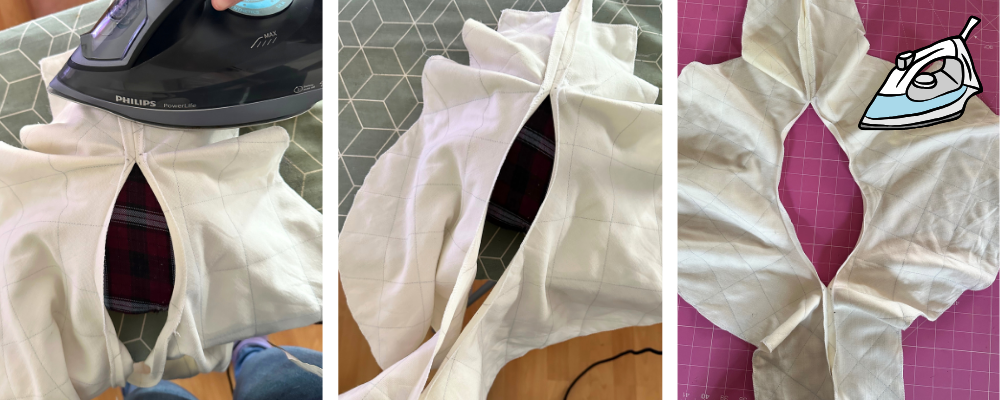
** If you are using soft leather, you may have to adjust the pressure of the presser foot, if the machine is not feeding properly. Test this on a small piece of folded leather before sewing in the zip.
Installing the zip:
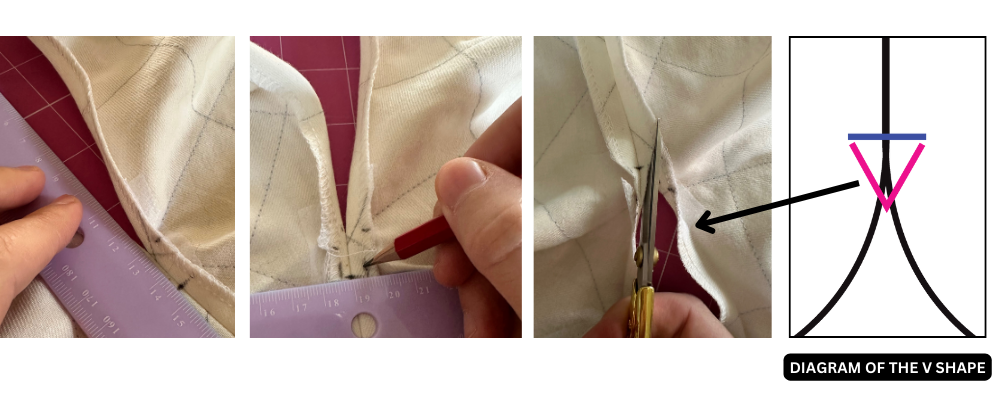
7. Measure down from the zip opening 1 cm and mark it. Then draw a V shape and make small snips along the pink lines shown in the diagram below. Do this for both sides of the center middle opening. This is where the zip will be sewn in.
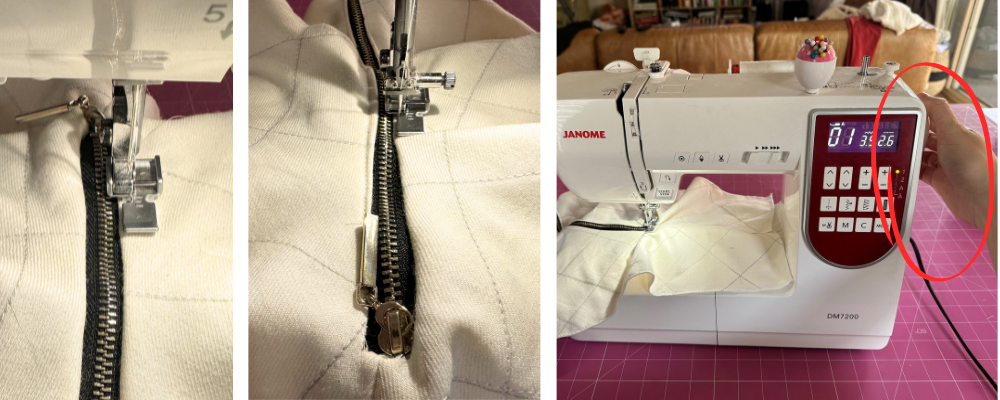
8. Pin the V shape fabric to the end of the zip, and sew in place together. This part might be tough for your sewing machine, so I would recommend to use the manual hand wheel on your sewing machine. As I am using a zip with metal teeth in this example, I didn’t want my sewing needle to break, so by using the hand wheel you can make sure you don’t hit any of the metal teeth as you sew it together.
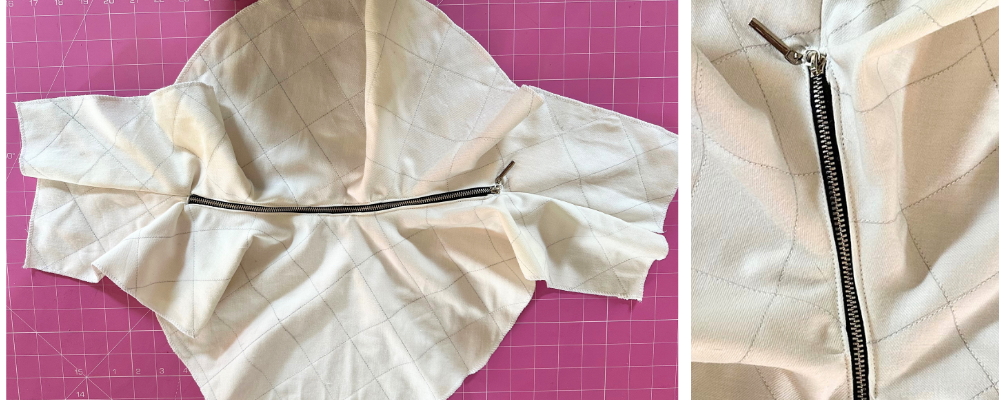
The image on the far right shows you what the zip will look like (on the right side) once sewn in.
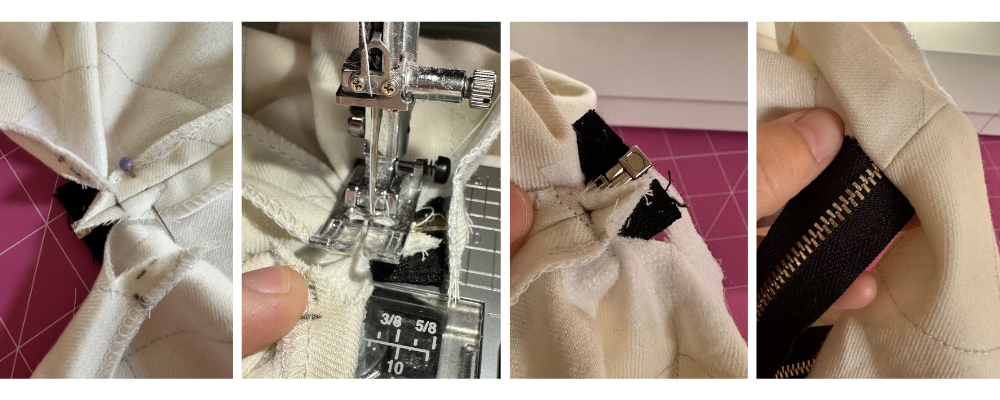
9. With the zip closed, pin the rest of the zip along the seam allowance on either side of the handbag opening.
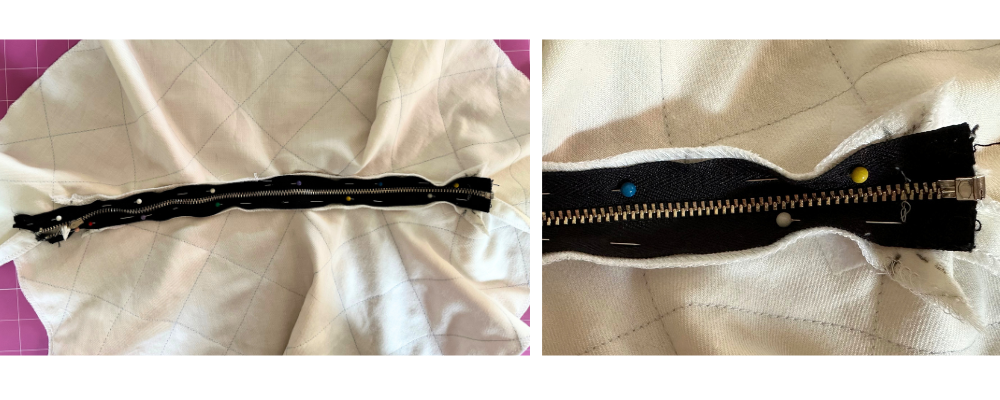
10. Then change the foot on your machine to a zipper foot. Sew along both long edges of the zip. First sew closer to the outer edge of the zip to secure it in place. Then sew along closer to the zipper teeth to get a nice finish.
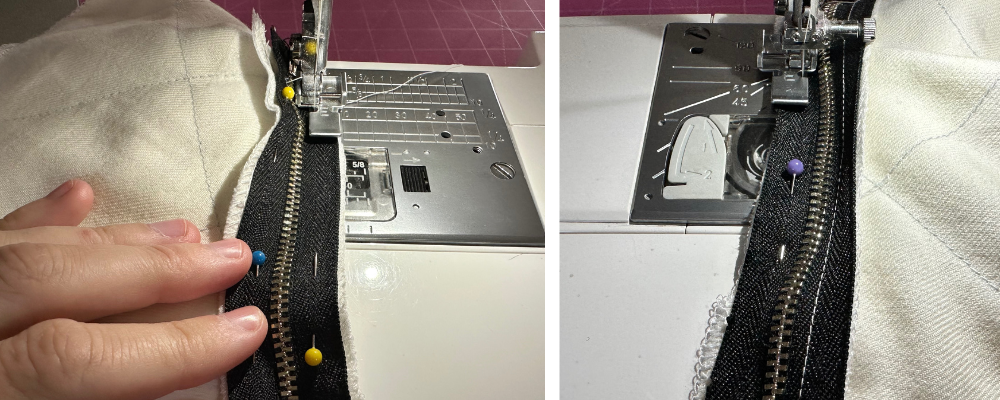
11. Once that’s done, top stitch around the zip. When you get close to the other end with the V shape you cut out earlier. Tuck it underneath and topstitch over to secure it in place. If the zipper teeth are metal, then use the hand wheel to sew over it (so you don’t break the needle).
12. Below is a photo of how your bag should be looking at this stage of the tutorial.
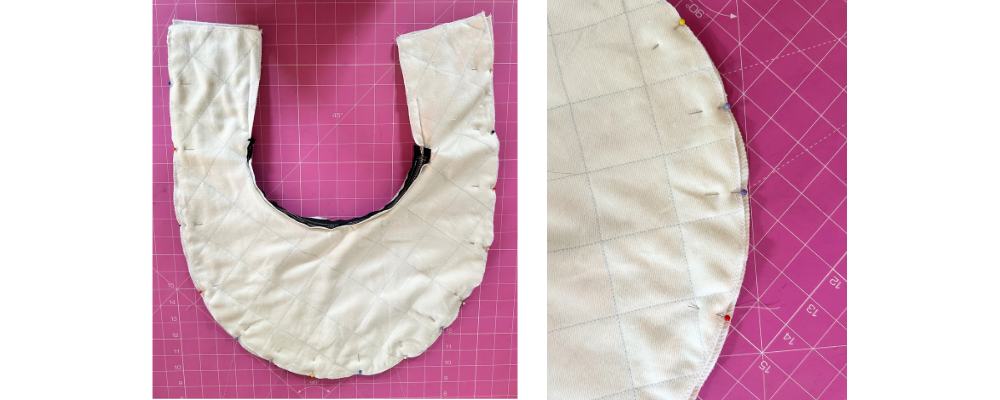
13. Fold the bag over with right sides together and pin all the way around the outer edge of the bag. Then make sure the zip is partially open. Then sew all the way around the outside edge of the bag with a 1cm seam allowance. Make sure to sew closed the inner edge of the handles as well.
14. Next, turn the handbag right side out. Below is a series of images, showing you how to turn the bag out to the correct way.
Click here to watch a short video showing you how to bag out & sew the straps together.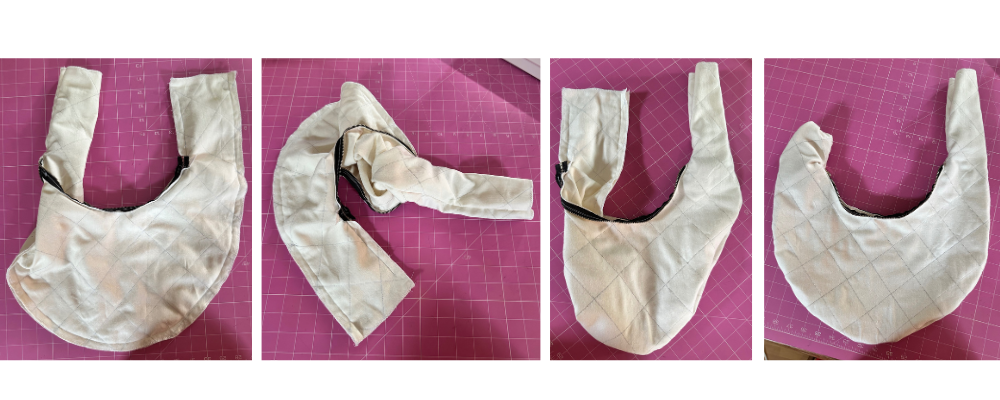
15. We are nearly done! We just need to pin and sew together the top of the handle for this bag.
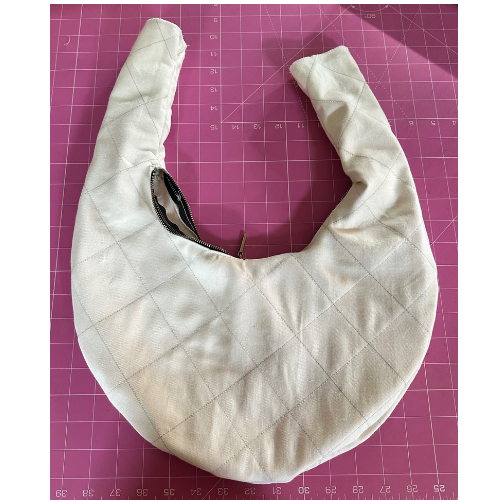
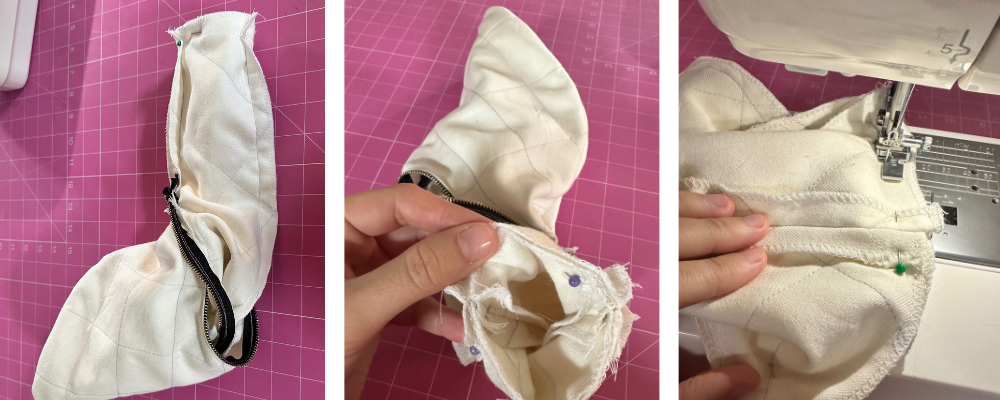
16. Take one of the bag handles and turn it back inside out (like shown in the first photo below). Then stick it up on the inside of the other bag handle. Pin the raw edges together. With it pinned in place, pull the handles back through (gently) to make sure it looks right of the outside and isn’t twisted.
If it looks good, then proceed to sew the whole way around the raw edges from the inside with a 1cm seam allowance. Pull it back out and you now have a new bag!
Congratulations! You have just completed your new shoulder bag!
We would love to see your new bag, please tag us on Instagram @mercy.makes so we can feature you in our stories!
Follow us on IG for all the latest sewing tips and new pattern releases. Follow us on IG Here
Ready to jump into a new project, browse all our apparel!


